

SPRING INSPIRED WEAVING
Posted on 21st April 2020 at 07:58
Become an expert weaver and create some lovely nature-inspired artwork! Whether you want to use materials that you find outside, like twigs, leaves and grasses, or anything you find around the home, such as ribbon, paper strips or bits of cloth. the outcome is really impressive!
Mel from Plas Gwynant shows you how below. Please share your creations with us using #SRESatHome or in the comments below, we'd love to see them!
Things you'll need
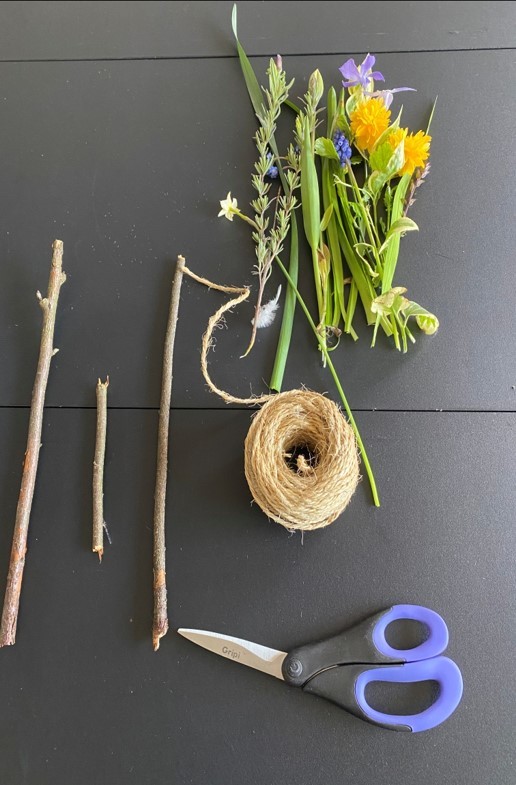
1. Twigs - find some twigs/sticks in your garden or out on the walk with your family
2. Flowers, leaves, stems, grass – use your imagination and creativity and collect anything that takes your fancy, this could be just different twigs, different types of leaves etc.
3. String – any type will do: yarn, thick cotton, even ribbons.
4. Scissors - ask parents and make sure they are comfortable for you to use them on your own or an adult can supervise.
As mentioned above, use your imagination and creativity and ask adults for help.
This method of weaving can even be used with the indoor materials that you can gather; yarn, ribbons, paper strips, bits of material.
Be creative!
Preparation
Cut 4 bits of string. If you cut around 20cm it should be plenty enough to allow comfortable knot tying and you can always trim the surplus later.
Here is the bonus skill: How to tie the clove hitch knot!
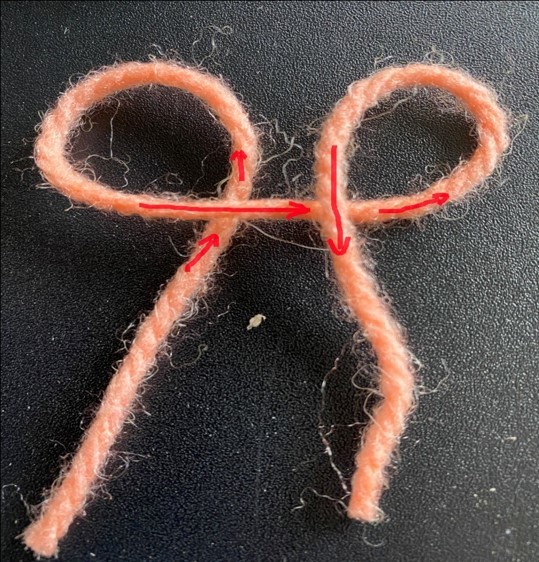
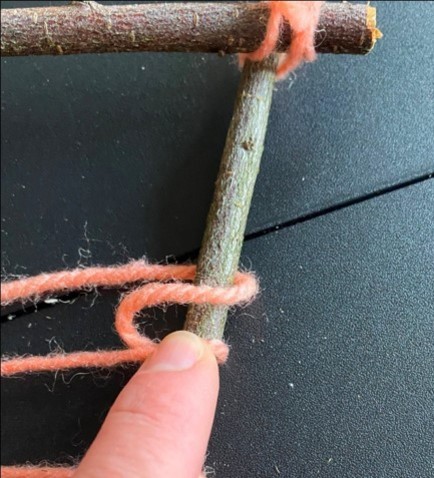
1. Make two loops.
Look carefully on the photo which strand goes on top and which one goes under.
2. Place your loop on the left OVER the top of the one on the right. It’s important that you pick it up as it is; don't twist it when you put it on top.
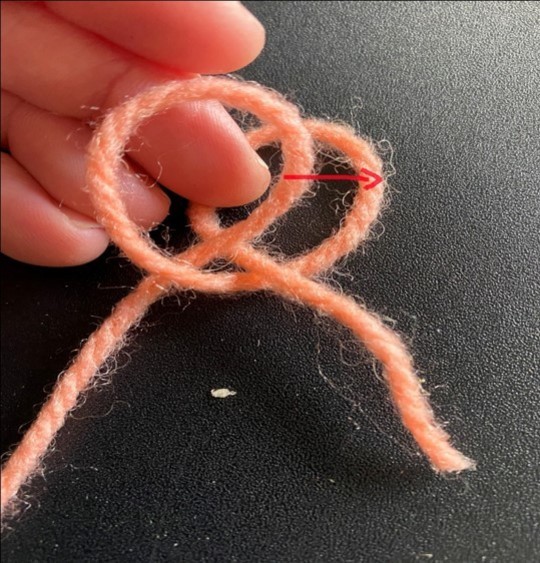
Your loops should now look like this!
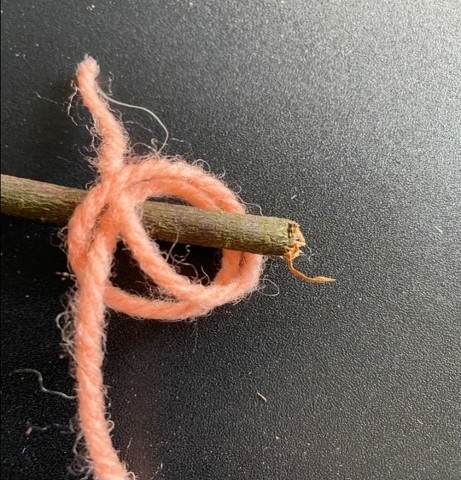
3. Pick up both loops together carefully and put the stick through them.
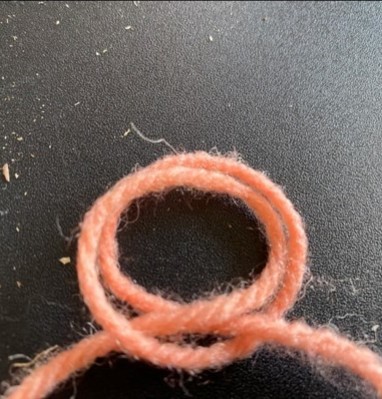
4. Pull both ends of the string as tight as you can!
Voila! You now know how to tie a clove hitch knot!
You can use this knot for many things. It's very strong and will help keep your twigs in place.
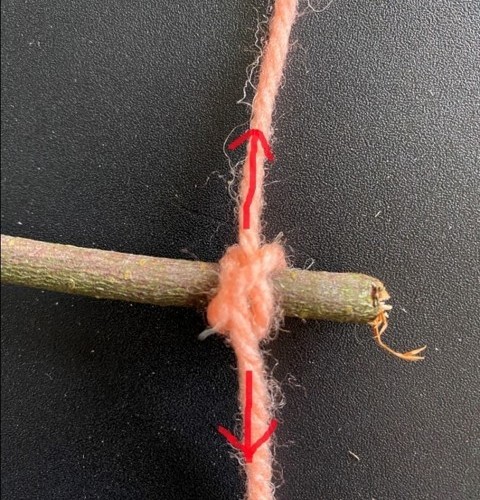
Time to tie the sticks together!
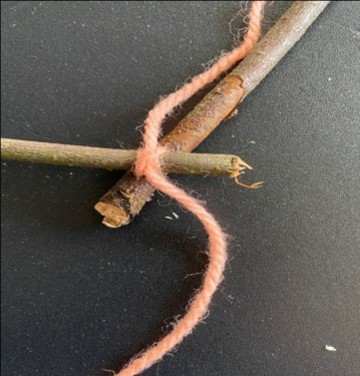
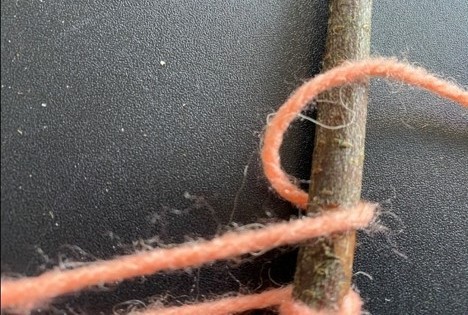
5. Put the sticks on top of one another and now go diagonally across the bottom stick, go under and cross the string underneath.
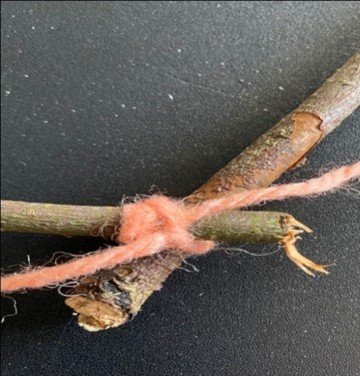
6. Now do the same on the opposite side and bring the string back up and tie a knot.
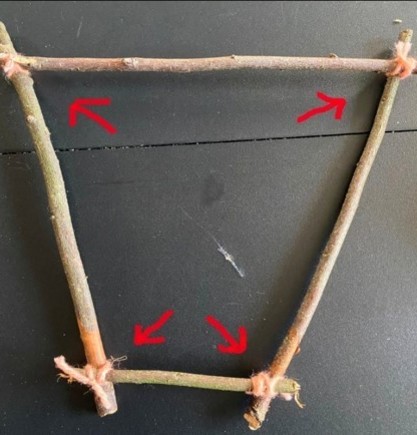
7. Repeat the process on all 4 sides.
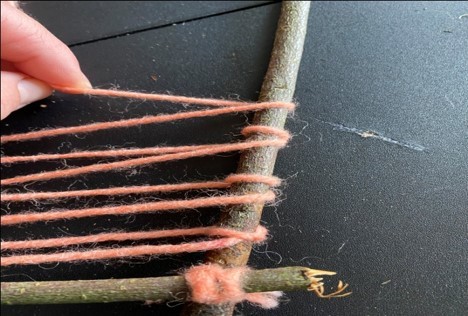
8. If your string is too long, to make it easier you can place the string as in the photo to measure and cut the length - just leave an extra couple of loops for knots, just in case.
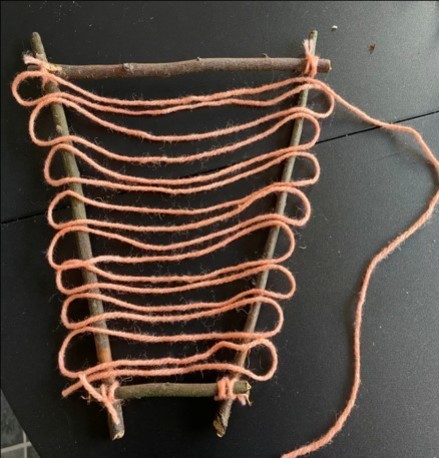
9. Tie the start of the string to the bottom, and start going from left to right. To help keeping string in place so it’s not moving up or down look at the next steps:
Pull the string tight around the stick.
To keep the tension and stop strand below getting loose, hold the string with your finger.
Go back over and under again.
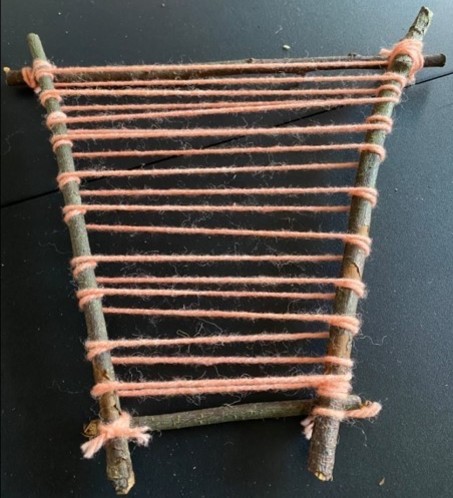
10. Repeat until you get to the top and you will have something looking like this. Don’t forget to tie the knot at the top to secure the string!
You are ready start weaving!
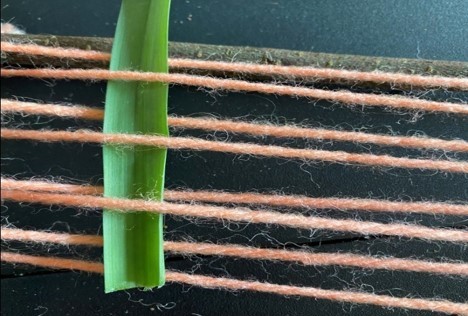
11. Carefully start weaving over-under-over-under…
13. Your next item should now go under-over-under-over.
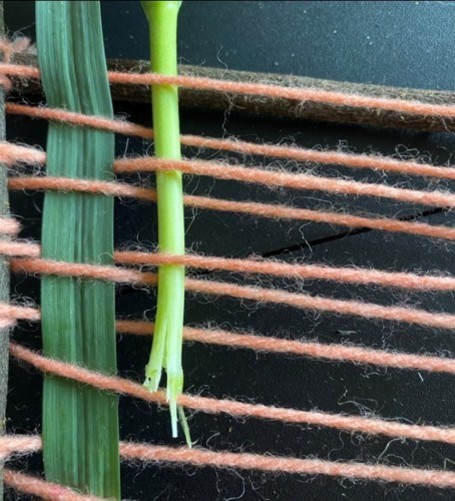
12. When you get to the bottom move the plant/leaf tight over to the left stick.
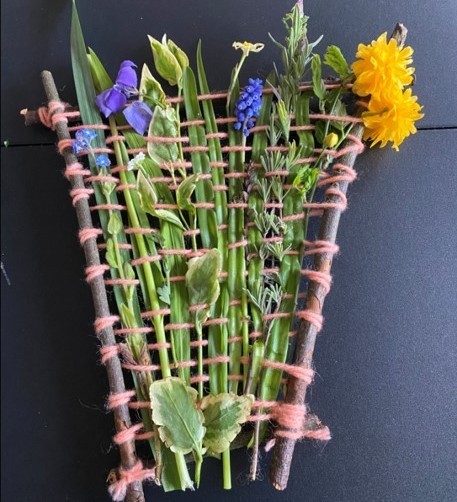
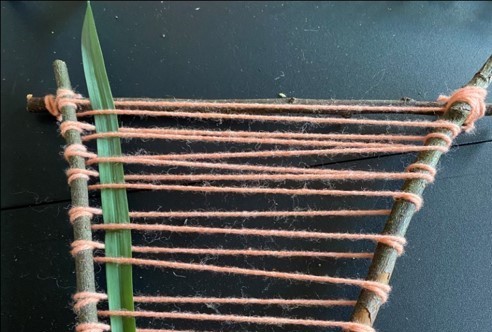
14. Keep repeating these steps untill you can’t fit any more and you should end up with something looking like this.
Well done! You've made it! You are now an expert weaver.
Here are some extra ideas for your nature inspired piece of art:
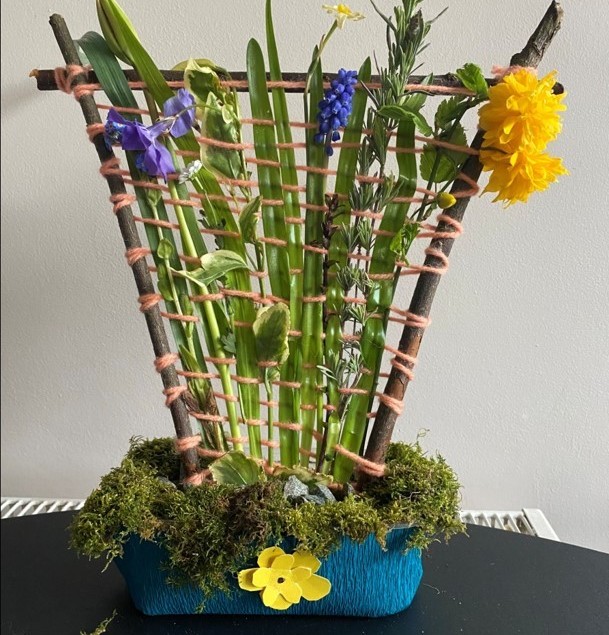
Try making and decorating a container. Use something out of your recycling bin, put some compost and rocks inside (or just water and moss) and it will keep your plants green for longer.
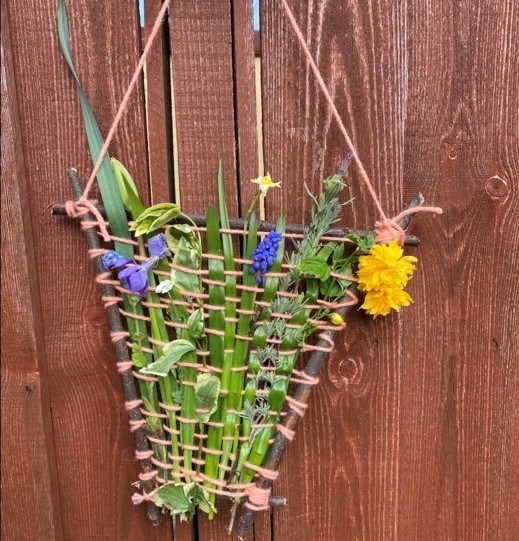
You can just tie the extra bit of string at the tops and hang it somewhere in your garden or in the house.
Let your creativity and imagination run wild!
You can use any plants, twigs, leaves and you can make any shapes; triangle, square, rectangle, or even a circle!
Please share your creations with us in the comments or at #SRESatHome, we would love to see them!
If you'd like to download this, you can find it here:
Share this post: